Wednesday, January 27, 2010

Desk/Dresser Catch-All

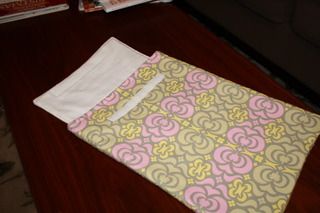
I made this for my brother for Christmas, I just finished it because we just celebrated last week so I had some extra time ;) I found the pattern in my new book "One-Yard Wonders" I LOVE this book-- there are so many great ideas!

This project was difficult-- I had to make my own bias tape, which I had never attempted before--and putting the bias tape on the square basket was difficult but I think it turned out well!

It has a hole to put cell phone/iPod chargers through-- genius!
Photobucket

I was supposed to use a quilting technique-- but I have never quilted ( I aspire to make a quilt one of these days) So I just sort of winged it ;)
Photobucket

Now that I am looking at these pictures I realize I really should wait until daylight to take pictures of my finished projects. I always finish reallllyyy late at night and I am so excited, I take pictures right away. I should be patient and wait until the next day!

Sunday, January 17, 2010

Pictures of my craft room

I am finally done! I am soooo happy with how it turned out-- the only problem is I don't want to work on anything because I don't want to mess it up!

I worked really hard to complete this project, spending the least amount of money possible. I had fun scouring clearance racks and finding things around the house I could re-use. After breathing fumes from 4 cans of spray paint and a LOT of ModPodge, I am thrilled with the results.

Check out the before pictures if you didn't see this post: Before Pictures

I had some focus issues, but I was tired of taking so many pictures


Close up-we already had the shelf (as this room is really a closet, we just never installed the shelves). I hung wooden dowels ($1 each at Home Depot) from the shelves to hang the ribbon. I found Amy Butler scrapbook paper on clearance at Fabric.com, so I used Modpodge to cover 12X12 corkboard (left over from a Christmas project), those are hanging behind the sewing machine. I also covered formula cans, and have scrap fabric in those.


The pink cookie jars were actually green and red, I found them after Christmas at Target for $2.50 each-- so I just spray painted the lids. I am using them for buttons, thread, etc.,


These were on sale at HearthSong for $2.50-- I couldn't pass up the deal, even if they were hideous! ModPodge to the rescue! Check out the next picture to see what they look like now


Here is what is looked like after I saved it from the horrid cherries;)


The pegboard was $7 at Home Depot-- I just used a little (err... a lot) of spray paint to make it look nice. I found the clipboard and the blue buckets in the $ Bins at Target-- I used even more spray paint and ModPodge to spruce them up.


The cute little yellow shelves were sitting in my garage. My Mom bought them ages ago (Presumably at a thrift store) She asked us to refinish them, but unfortunately we never got around to it. They were both chipped and a dingy white. I think she would be happy that I am using them :)


This isn't all that exciting-- but I moved the file cabinet that was under the table and put a bookshelf (yet another thing collecting dust in our black hole garage) it fit perfectly and adds a lot of extra storage. I might use this for fabric one day.


Saturday, January 16, 2010

The craft room is finished!

I took the day off work yesterday and worked all day! I spray painted and ModPodged by tooshie off-- but still didn't finish! Today, I took the kids to the play place at Chick-Fil-A to get them nice and tired so they would (hoepfully!) take good naps. It worked! I was able to get everything finished.

I just took pictures but it's 8:00 at night, so there isn't any natural light so needless to say they look pretty craptastic. I am going to take them again tomorrow so I can post them.

It looks so great-- I want to work on something tonight but I am tired!

Tuesday, January 12, 2010

Car Cozy

This weekend we went to my nephew's 2nd Birthday party! You would have thought it was a National Holiday, Alexis was sooooooooooooooo excited! She loves a good birthday party ;)


I saw the cutest idea on Homemade by Jill, which she got from My Little Gems
I fell in love with the idea and knew the perfect recipient. I used most of the ideas and measurements from Jill-- but made a few minor changes. I really wanted to try applique, so instead of a car, I used a "M"-- I am really happy with how it turned out. I also shortened the strap (I didn't have the belt material, so I made one from fabric)


Photobucket

Photobucket

Photobucket


Photobucket

I messed up and the "road" wasn't long enough :( I was going to put a felt STOP sign or tree on there, but I ran out of time! Measure twice, cut once. :)


Wednesday, January 6, 2010

The Great Craft Room Make-Over--a Work in Progress

My "Craft Room" is actually a large walk-in closet which we converted to a home office when we moved in here. Now that I am sewing, the area is slowly being taken over with all of my stuff. I started getting hives (not really-well maybe a little) when I came in here because it is such a disaster and I can't find anything! It is not conducive to my creativity ;)


So-- I am organizing and creating a space that I can work in, and that I love-- I am so excited, and can't wait to finish! I took these pictures last weekend- I have already started decluttering and am slowly collecting things to use for storage. As soon as my dear, sweet, loving husband installs the shelf-- I can put everything together! *hint, hint*


Here are the "Before" pictures. I honestly can't believe I am sharing these-- they are pretty embarrassing! But keep in mind that this is a SMALL space, which makes it perfectly acceptable to have a big giant mess ;)


View from the door, looking to the left at the bookcases

View from the door-left


Other view from the door-- looking to the right

View from the door-right


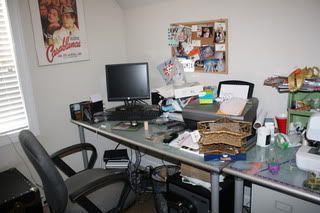
Computer table-- my sewing stuff is slowly creeping over-- maybe nobody will notice

Computer table


The Sewing area-- I like to watch Dora

Sewing table

Underneath the sewing table

Under the table

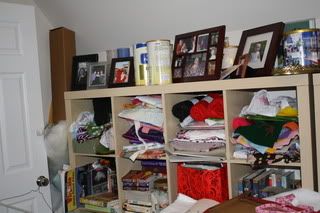
The bookshelves-- I put fabric on the top 4

Bookshelf-fabric

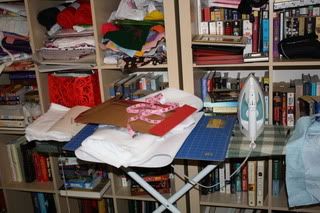
There is an ironing board under all of that stuff

Ironing board


Stay tuned for the after pictures!


Tuesday, January 5, 2010

Christmas Project #4

I love love love how this turned out!!! I found this tutorial through Sew Mama Sew--- Elizabeth from Oh Fransson featured a new tutorial every month during 2009. I new this was something easy that I could manage.

Halfway through the project I hit a roadblock and was stuck. I thought I was following the directions carefully but when I turned it right side out-- the closure flap was sewn inside! WHOOPS! I was so frustrated and it was really late at night and I just wanted to finish! I decided to look up Elizabeth's e-mail on her blog and hoped to hear back from her in a few days-- she wrote me back right away!! AWESOME! She helped me figure out what I did wrong and I was able to finish it that night!

Photobucket

Photobucket


I made a matching mouse pad and pen holder too- but of course I didn't take pictures :(


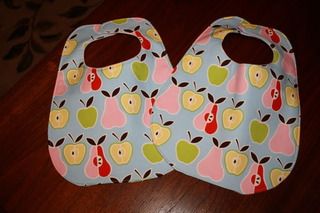
Bibs

I made these cute bibs for friends who recently had twin baby girls-- "The Perfect Pair". Nothing too exciting about this project-- but it was fun and easy, which is perfect for me!

I am going to make another one with a matching burp cloth for a baby boy.

Photobucket


I should probably make some for my own baby-- she tends to make a mess from time to time

Photobucket

Saturday, January 2, 2010

Christmas Project #3

The Slouch Bag


This is the "Slouch Bag" is for my sister. I LOVE IT! Can I keep it for myself? I royally screwed it up for the first time I made it. I wasn't paying close enough attention and cut EVERY SINGLE fabric piece out incorrectly!! What a waste of time and precious (very expensive) Heather Bailey fabric! Once I sat down to do it again, I took my time and really paid attention and it was actually really easy to make! She claims she likes it too ;)


I bought the tutorial from Alifoster on Etsy


Christmas Project #2

I made this tea wallet for my sister in law-- I thought she might like the option of carrying a few tea bags in her purse, or it will just look cute on her counter top ;) I haven't given it to her yet, hopefully I will see them in a few weeks, I hope she likes it!

I found the tutorial here: http://blog.christyscreations.com/tea-wallet-tutorial/


Handmade Christmas-Project #1

Let me start by saying, this is the FIRST "Real" project I have ever done-- I have made a LOT of simple blankets (Dan keeps teasing me that everything I make is a rectangle). But I haven't tried anything from a pattern since Home Ec class, my freshman year of high school, many moons ago.

I bought the pattern for this "Girl's Best Friend Wallet" from JennaLou06 on Etsy, here is her blog .

Keep in mind, this was my FIRST one and truthfully, it is pretty terrible. See? I can admit these things. Although it is messed up, it still LOOKS like a wallet and it ALMOST serves the purpose, so I was pretty proud of it!


It is hard to tell from the pictures, but you can't fit credit cards into the top two slots and the outer velcro doesn't close very well. I put it aside with the hopes that I would find time to make another one. But I knew if I didn't get around to it, Patti would like it anyway ;)

I did end up having the extra time to make it again, and it was SOOO much better! Practice makes perfect. Of course, I forgot to take pictures of it-- I will have to ask Patti to take pictures of it now that she is putting it to use.